How to Clean Bird Feeders and Keep Your Flock Healthy
A bird feeder that looks fine from a distance can still be a serious health hazard up close. Wet seed, accumulated droppings, and moldy hulls create the perfect conditions for bacteria and fungal growth, and because feeders concentrate birds in one small space, they can also become a fast way to spread illness through a local flock. The good news is that a regular cleaning routine is simple, cheap, and doesn’t take much time — and it’s one of the most impactful things you can do to keep the birds visiting your yard genuinely healthy.
Why Feeder Cleaning Matters
Bird feeders naturally accumulate moisture from rain, dew, and condensation, which mixes with seed hulls, droppings, and old food to create an environment where mold, bacteria, and parasites can thrive. Diseases such as salmonellosis and avian conjunctivitis (sometimes seen in house finches and goldfinches) can spread when many birds feed shoulder to shoulder at a contaminated feeder, since sick birds shed bacteria or viruses onto perches and into leftover seed that healthy birds then contact. Regular cleaning breaks that chain and reduces the risk of your feeding station becoming a source of illness rather than a benefit to local birds.
How Often Should You Clean?
A general rule of thumb is to clean seed feeders every two weeks under normal conditions, and weekly during humid or rainy stretches, during periods of heavy feeder traffic, or any time you notice sick or lethargic birds nearby. Hummingbird feeders and other nectar feeders need much more frequent attention — every three to four days in warm weather, since sugar water ferments and grows mold quickly, and even faster in hot climates. Bird baths should be scrubbed and refilled every few days as well, since standing water is especially prone to algae and bacterial buildup.
Signs it’s time for an immediate cleaning
- Visible mold, either black or greenish, on feeding ports or trays
- Clumped, wet, or foul-smelling seed
- A buildup of droppings on perches or the feeder’s base
- Any sighting of a sick-looking bird, especially one with swollen or crusty eyes, fluffed feathers, or lethargic behavior
What You’ll Need
Cleaning a bird feeder doesn’t require anything specialized. A basic kit includes:
- A stiff bottle brush or dedicated feeder-cleaning brush that can reach into narrow ports and corners
- Dish soap and warm water for a first wash
- A diluted bleach solution (about one part bleach to nine parts water) or white vinegar as a disinfecting rinse
- Rubber gloves to protect your hands from bacteria and residue
- A towel or drying rack, plus a spot with good airflow to let feeders dry completely
Step-by-Step Cleaning Process
1. Empty and pre-rinse
Dump out all remaining seed, discard any that looks clumped, discolored, or moldy, and give the feeder a quick rinse with plain water to knock loose loose debris before you start scrubbing.
2. Disassemble what you can
Take the feeder apart as much as its design allows — removing base trays, perches, or seed tubes gives you access to corners and seams where grime tends to hide. Many tube and hopper feeders are designed to come apart fairly easily for exactly this reason.
3. Scrub with soap and water
Wash all parts thoroughly with warm, soapy water and a bottle brush, paying particular attention to feeding ports, perches, and any crevices where old seed or droppings collect.
4. Disinfect
Soak the parts for several minutes in a diluted bleach solution (roughly one part bleach to nine parts water) or a full-strength white vinegar bath, both of which are effective at killing mold spores and bacteria that soap alone may not fully remove.
5. Rinse thoroughly and dry completely
Rinse every part well to remove all traces of bleach or vinegar, since residue can irritate birds. Let the feeder air-dry fully, ideally in sunlight, before refilling — reassembling and filling a still-damp feeder undoes much of the benefit of cleaning it in the first place.
Don’t Forget the Ground Below
Spilled seed and hulls accumulate under feeders over time, creating a damp, contaminated layer on the ground that attracts rodents and can harbor the same bacteria and mold found in the feeder itself. Raking up debris under your feeding station every few weeks, especially during wet weather, helps keep the whole area healthier. Moving feeders periodically to a new spot in the yard, when practical, gives the ground beneath a chance to recover and reduces the buildup of waste in any single location.
Suet Cages and Nectar Feeders Need Attention Too
Suet cages are easy to overlook, but built-up grease and old, rancid suet crumbs can go moldy just like seed can. Scrub cages with warm soapy water whenever you replace a suet cake, especially in warmer weather. Hummingbird and oriole nectar feeders demand the most frequent care of all your equipment: sugar water left too long ferments into alcohol and grows mold that’s genuinely dangerous to birds, so plan on a full clean with a bottle brush and vinegar or diluted bleach rinse every time you refill during warm weather, not just occasionally.
Feeder Materials Make a Difference
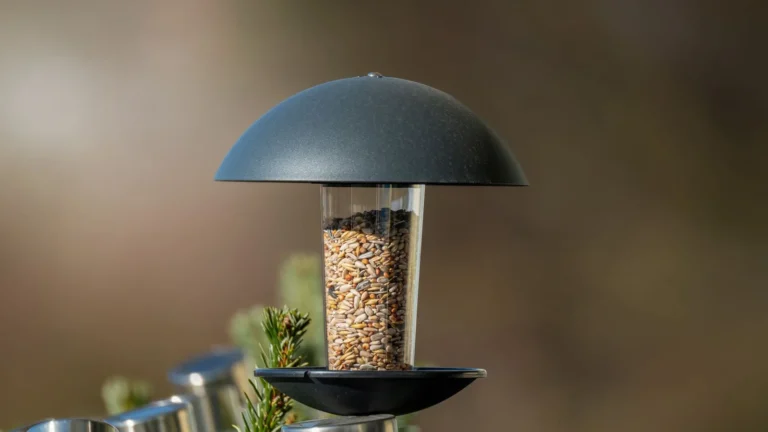
Some feeder designs are simply easier to keep clean than others, which is worth considering the next time you’re shopping for new equipment. Feeders with wide, removable trays and few tight seams are far easier to scrub thoroughly than models with narrow tubes or intricate decorative parts where grime can hide. Wood feeders look attractive but tend to absorb moisture and are harder to fully disinfect over time compared to metal, ceramic, or heavy-duty plastic designs that can be scrubbed and rinsed without degrading. If you’re replacing an old feeder, look for one that comes apart easily into two or three simple pieces — you’ll be far more likely to actually clean it on schedule if the process doesn’t feel like a chore.
What to Do If You Suspect an Outbreak
If you notice several sick or dead birds near your feeding station, the safest response is to take feeders down entirely for one to two weeks. This gives the local flock time to disperse and forage naturally elsewhere, breaking the cycle of birds repeatedly gathering at a contaminated site. While feeders are down, thoroughly clean and disinfect everything, including poles, baffles, and the ground beneath the feeding station, before putting equipment back out. This kind of temporary shutdown feels drastic, but it’s a standard, well-established response among experienced birders and wildlife rehabilitators when disease is suspected, and it protects far more birds than continuing to feed through an active outbreak would.
Building Cleaning Into Your Routine
The easiest way to keep up with feeder maintenance is to attach it to something you already do regularly, such as your grocery run or weekend yard work. Keeping a dedicated brush and a small bottle of diluted cleaning solution near your feeding station removes the friction that often causes cleaning to get skipped. If you maintain several feeders, consider staggering their cleaning across the week rather than trying to tackle everything at once — it keeps the task manageable and ensures no single feeder goes too long between scrubbings.
A Healthier Flock Starts With a Clean Feeder
It’s easy to focus entirely on the food you offer and overlook the equipment delivering it, but a dirty feeder can undo the benefit of even the highest-quality seed. A consistent cleaning schedule — every two weeks for seed feeders, more often for suet and nectar, and prompt attention any time you spot mold or a sick bird — is one of the simplest ways to make sure your backyard is a genuinely safe, healthy stop for the birds that depend on it.
Related reading
- How to Keep Squirrels Off Your Bird Feeders (Methods That Actually Work)
- Bird Bath Basics: Water That Brings in More Birds Than Feeders
- Best Bird Feeders for Beginners: Types, Placement, and What to Avoid
- Platform, Tube, or Hopper: Choosing the Right Bird Feeder
Sources & further reading
Dirty feeders spread disease, and cleaning them is cheap. When you’re shopping, a feeder cleaning brush set makes the biggest difference — take a moment to see current options on Amazon. As an Amazon Associate, Feeder Flock earns from qualifying purchases. Your price never changes.