Hummingbird Feeders: Nectar Recipe, Placement, and Cleaning
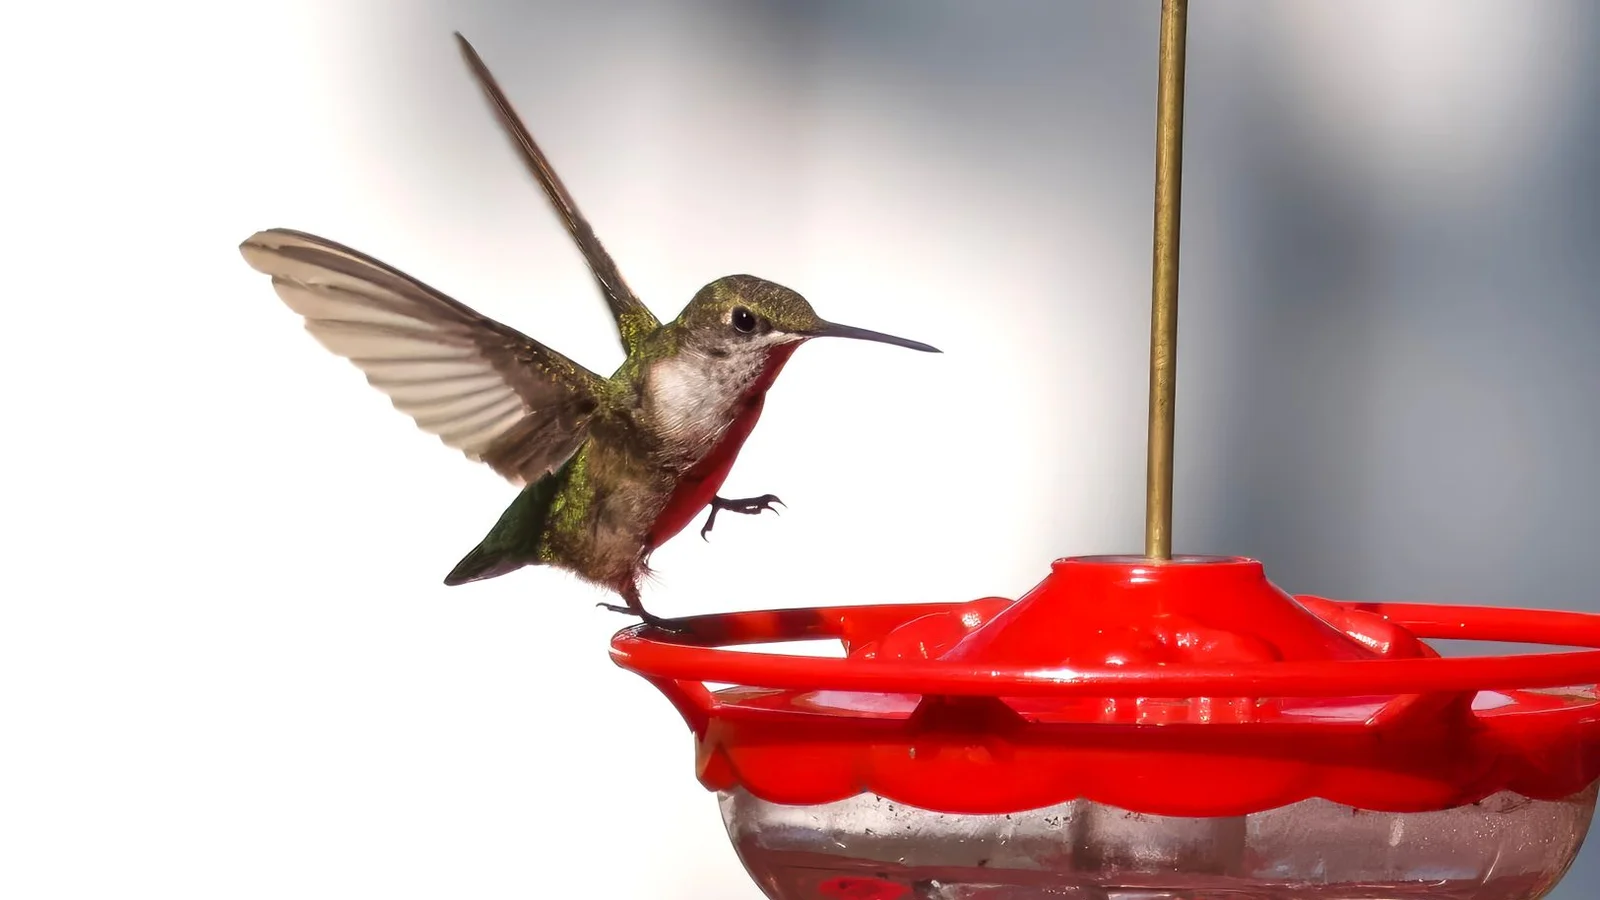
Hummingbird feeders look simple — a jar of red liquid with a few plastic flowers — but getting consistent visits, and keeping the birds that come safe and healthy, depends on details that are easy to get wrong. The nectar recipe, where you hang the feeder, and how often you clean it all matter more than the style or price of the feeder itself. Here’s what actually makes a difference, from the first fill to the end of the season.
The Nectar Recipe: Keep It Simple
Homemade nectar is not only cheaper than store-bought mixes, it’s also better for the birds, since it avoids the red dye found in some commercial products. The ratio is straightforward:
- 1 part white granulated sugar to 4 parts water (for example, 1 cup sugar to 4 cups water)
Boil the water first, stir in the sugar until it’s fully dissolved, then let the mixture cool completely before filling the feeder. Boiling isn’t strictly required by the ratio, but it helps the sugar dissolve fully and slows bacterial growth slightly, which is useful in hot weather. Never increase the sugar concentration beyond this ratio — a stronger mix doesn’t attract more birds and can be hard on their kidneys and liver over time. Diluting it further to save sugar isn’t a good idea either, since it provides less energy than hummingbirds need.
Only use plain white cane sugar. Skip honey, which ferments quickly and can promote a fungal infection that’s dangerous to hummingbirds. Avoid brown sugar, raw sugar, agave, or any sugar substitute, since these don’t match the sucrose composition hummingbirds are adapted to digest, and some can be harmful. And skip red food dye entirely — it isn’t necessary to attract hummingbirds (the feeder’s design and color do that job) and there’s no clear evidence it’s safe for them.
Extra nectar keeps well in the refrigerator for up to a week or two, so it’s easy to make a larger batch and portion it out at refill time.
Where to Place the Feeder
Hummingbirds are drawn to bright, contrasting colors, especially red, which is why most feeders are designed with red parts even without dye in the nectar. Beyond color, placement affects both how quickly birds find the feeder and how safe and comfortable they are once they do:
- Partial shade keeps nectar from spoiling as quickly in direct sun and heat, and gives visiting birds a more comfortable spot to feed.
- Near cover — a shrub or small tree within 10-15 feet gives hummingbirds a place to perch, watch for threats, and retreat to.
- Away from wind, since feeders that swing constantly are harder for birds to feed from and more likely to spill.
- A few feet from windows, or alternatively very close (under 3 feet) — either placement reduces the risk of collision, since it’s the mid-range distances that give birds enough speed to be hurt but not enough time to see and avoid the glass.
If you have more than one hummingbird feeder, spacing them out of sight of each other, or well apart, helps reduce the aggressive, territorial squabbling hummingbirds are known for around a single crowded feeder.
Cleaning Schedule: The Most Important Habit
Nectar spoils fast, and moldy or fermented nectar is one of the more serious health risks hummingbirds face at feeders. As a general guideline:
- Every 2-3 days in cool weather (under 70°F)
- Every 1-2 days in hot weather (above 80-90°F), since heat speeds up fermentation dramatically
- Immediately if you notice cloudy nectar, mold, or black spots anywhere in the feeder
A full cleaning means emptying the old nectar, rinsing thoroughly, and washing with hot water — avoid soap, which can leave a residue that’s difficult to rinse fully from small feeder parts and may deter birds. A bottle brush or pipe cleaner helps get into feeding ports and tubes, where mold tends to build up first. If you see black mold that doesn’t come off with washing, a dilute solution of water and white vinegar, followed by a thorough rinse, works well; a very dilute bleach solution (one part bleach to about nine parts water) can also be used for stubborn buildup, but rinse the feeder extremely thoroughly afterward — several rinses, until there’s no bleach smell at all — before refilling.
Only fill the feeder with as much nectar as you expect hummingbirds to finish within that cleaning window. A feeder that’s mostly full when you dump it out means you’re making more than your local birds are using — better to fill it partway more often than to fill it completely and let leftover nectar spoil.
Watch for Ants and Bees
Sugar water attracts more than hummingbirds. A few practical fixes:
- Ants: An ant moat — a small water-filled cup that sits between the hanger and the feeder — stops ants from crawling down to the nectar, since they can’t cross the water barrier. Many feeders come with a built-in moat; separate moats can be added to almost any hanging feeder.
- Bees and wasps: Choose a feeder with bee guards — small plastic mesh covers over each feeding port that let hummingbird bills through but keep out the wider mouthparts of bees and wasps. If bees are a persistent problem, moving the feeder to a new spot for a few days can also help, since bees rely on visual memory of the specific location.
Seasonal Timing
Put feeders out before you expect the first hummingbirds to arrive in spring — a couple of weeks ahead of the typical arrival date for your region is a reasonable rule of thumb, since early scouts benefit from a ready food source and you don’t want to miss the first arrivals. In fall, there’s no need to rush to take feeders down when you notice fewer visits; leaving a feeder up a few extra weeks does not delay migration, which is triggered by day length and hormonal changes rather than food availability. It’s safe to keep feeding until you haven’t seen a hummingbird for one to two weeks, which also gives late migrants passing through a reliable stop.
Choosing a Feeder That’s Easy to Maintain
Feeder design has a big effect on how consistently you’ll actually keep up with cleaning, which in turn affects how safe the feeder is for the birds using it. Saucer-style feeders, which sit flat with the nectar reservoir on the bottom, tend to be easier to disassemble fully and wipe out than tall bottle-style feeders, where nectar sits in a narrow inverted jar and mold can build up out of easy reach. Look for a design with few small crevices, a wide opening for a brush or your hand, and parts that come apart without tools. A feeder you find annoying to clean is a feeder you’ll put off cleaning — and that gap is exactly where nectar spoilage and mold problems start.
Skip the Extras
You don’t need commercial nectar concentrates, vitamin additives, or specialty “hummingbird food” powders — plain sugar and water in the correct ratio gives hummingbirds exactly what they need. The money is better spent on a feeder that’s easy to take apart and clean thoroughly, since ease of cleaning has a much bigger impact on hummingbird health than any additive ever will.
Get the ratio right, keep the feeder clean on a real schedule, and place it somewhere shaded and sheltered, and you’ve covered the fundamentals that matter most. Everything else — feeder shape, number of ports, color accents — is really just a matter of preference, both yours and theirs.
Related reading
- Best Bird Feeders for Beginners: Types, Placement, and What to Avoid
- How to Clean Bird Feeders and Keep Your Flock Healthy
- Bird Bath Basics: Water That Brings in More Birds Than Feeders
- How to Keep Squirrels Off Your Bird Feeders (Methods That Actually Work)
Sources & further reading
Ready to stock up? A hummingbird setup is refreshingly simple. You can see current options on Amazon for a glass hummingbird feeder, or compare today’s listings on Amazon for an ant moat. As an Amazon Associate, Feeder Flock earns from qualifying purchases. Your price never changes.